Welcome to our comprehensive guide on central heating pump installation. This guide will walk you through the essential steps, tools, and safety tips to ensure a successful setup. Learn how to replace or install a new pump efficiently, ensuring optimal performance and energy savings for your home heating system.

1.1 What is a Central Heating Pump?
A central heating pump is a vital component of a home heating system, responsible for circulating hot water from the boiler to radiators and back. It ensures efficient heat distribution, maintaining consistent temperatures throughout the house. Unlike boilers, which heat the water, the pump focuses on pressurizing and moving the water through the system. Over time, parts like the impeller or bearings can wear out, leading to system inefficiencies. Regular maintenance and timely replacement are essential to prevent issues like cold radiators or uneven heating. Understanding its function is key to ensuring your heating system operates smoothly and effectively.
1.2 Importance of a Central Heating Pump in Your System
A central heating pump plays a crucial role in ensuring efficient heat distribution throughout your home. It circulates hot water from the boiler to radiators and back, maintaining consistent temperatures. Without a functional pump, your system would struggle to heat evenly, leading to cold spots and reduced efficiency. The pump also helps reduce energy consumption by optimizing water flow, which can lower your heating bills. Additionally, it supports system reliability by preventing overheating and ensuring all components work together seamlessly. A well-functioning pump is essential for maximizing the performance and longevity of your heating system, making it a vital investment for any home.
1.3 Brief Overview of the Installation Process
Installing a central heating pump involves several key steps to ensure a smooth and efficient setup. Begin by disconnecting the electrical and water supplies to the old pump, taking care to isolate the system completely. Next, remove the old pump and prepare the area for the new one. Install the new pump, ensuring it is correctly aligned with the system’s water flow direction, as indicated by the manufacturer’s arrows. Reconnect the electrical and water supplies, double-checking all connections for tightness and accuracy. Finally, test the pump to ensure proper operation and bleed the system to remove any airlocks. This process requires precision and adherence to safety guidelines to guarantee optimal performance and longevity of your heating system.
Types of Central Heating Pumps
Central heating pumps include circulator pumps, centrifugal pumps, and variable speed pumps. Each type offers unique features, with variable speed pumps being the most energy-efficient option for modern systems.

2.1 Overview of Different Pump Types
Central heating systems utilize various pump types to circulate hot water efficiently. The most common are circulator pumps, which are compact and designed for closed-loop systems. Centrifugal pumps are another option, known for their high flow rates and durability. Variable speed pumps are increasingly popular due to their energy efficiency, as they adjust speed based on demand. Additionally, grinder pumps and submersible pumps are used in specific applications. Each type has unique features, and selecting the right one depends on system requirements, such as flow rate, pressure, and energy consumption. Modern pumps, like those from Grundfos, often combine reliability with advanced technology for optimal performance.
2.2 Choosing the Right Pump for Your System
Selecting the right pump for your central heating system is crucial for optimal performance. Always ensure the pump is compatible with your existing setup by checking its specifications, such as flow rate and pressure. Energy-efficient models, like variable-speed pumps, can significantly reduce energy consumption and lower bills. Consider the system’s size and layout to avoid under or over-powering. If upgrading, match the new pump’s capabilities with your boiler’s output. For complex systems, consulting a professional is recommended. Modern pumps, such as those from Grundfos, offer advanced features and reliability. Prioritize quality and efficiency to ensure long-term savings and system longevity.
2.3 Energy-Efficient Pump Options
Energy-efficient pumps are a smart choice for modern central heating systems, offering significant savings on energy consumption and bills. Variable-speed pumps adjust their operation to demand, reducing unnecessary energy use. Low-energy models, such as those with brushless motors, provide high efficiency and reliability. Consider upgrading to an energy-efficient pump to minimize environmental impact and lower operating costs. Modern pumps, like those from Grundfos, are designed with advanced technology to optimize performance while reducing energy consumption. Always look for pumps with high energy ratings or certifications, as they are designed to meet strict efficiency standards. Investing in an energy-efficient pump ensures long-term savings and supports eco-friendly heating solutions.

Planning and Preparation
Proper planning ensures a smooth installation. Gather tools like adjustable spanners and Stilson wrenches, and isolate electrical and water supplies. Understand your system layout and prepare for potential water leaks by having towels ready. Always follow safety guidelines and manufacturer instructions to avoid complications. A well-planned approach saves time and minimizes risks during the installation process.
3.1 Tools and Materials Needed
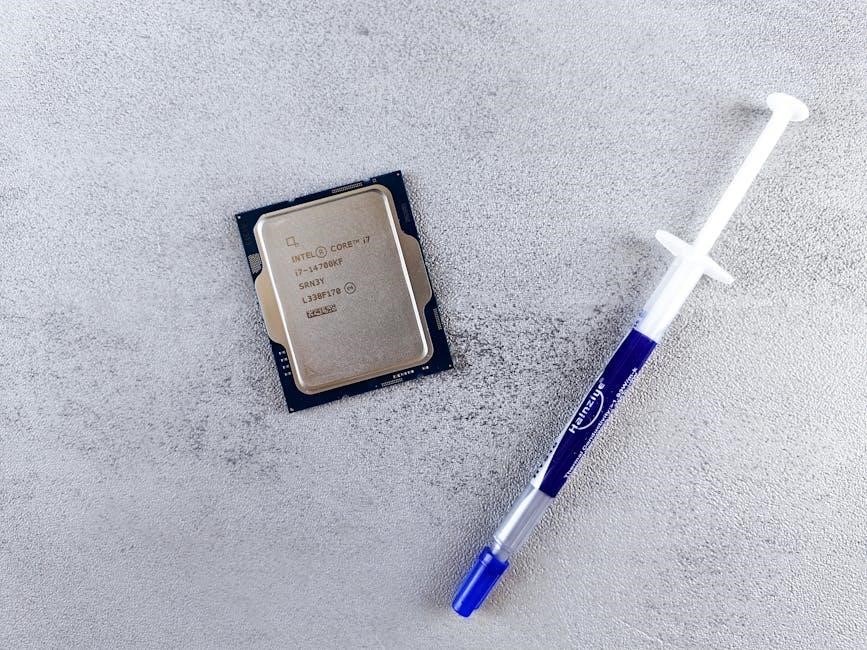
For a successful central heating pump installation, gather essential tools and materials. An adjustable spanner or Stilson wrench is crucial for disconnecting and reconnecting pipework. A bucket or tray is needed to catch water during removal. New washers should be installed to prevent leaks, and towels or protective coverings are necessary to shield surfaces from water damage. Ensure you have a camera or notebook to document electrical connections before disconnection. Additionally, consult the manufacturer’s instructions for specific requirements. Having the right tools and materials on hand ensures efficiency and minimizes the risk of complications during the installation process.
3.2 Safety Precautions and Guidelines
Before starting the installation, ensure all safety precautions are in place. First, turn off the electrical supply to the pump at the consumer unit or fuse box. Switch off the central heating system to prevent accidental activation. Protect surrounding areas with towels or covers to avoid water damage. Wear appropriate protective gear, including gloves and safety goggles, to prevent injury. If you’re unsure about any step, consider consulting a professional. Always follow the manufacturer’s instructions for specific safety recommendations. Proper preparation and adherence to safety guidelines will help ensure a smooth and incident-free installation process.
3.3 Understanding Your Existing System
Understanding your existing central heating system is crucial before installing a new pump. Familiarize yourself with the layout, including the boiler, radiators, and pipework. Locate the pump’s position and identify its role in circulating hot water. Check the system’s pressure and ensure it aligns with the manufacturer’s recommendations. Look for signs of wear, corrosion, or blockages in the pipes, as these can affect the pump’s performance. If you have a combi boiler, note that the pump is typically built-in, whereas conventional systems have a separate pump. Consulting your boiler’s manual can provide insights into compatibility and specific requirements. This knowledge will help you make informed decisions during the installation process.
3.4 Shutting Off Electrical and Water Supplies
Before starting the installation, it’s essential to shut off both the electrical and water supplies to the pump. For the electrical supply, locate the circuit breaker or fuse box and switch off the power to the pump. Verify the power is off using a voltage tester. Next, turn off the water supply valves located on both the inlet and outlet sides of the pump. These valves are typically adjustable and should be turned clockwise to shut off the water flow. Draining the system may be necessary, but some setups allow replacing the pump without full drainage. Protect the area from water spills by placing towels or a tray underneath the pump. Always follow safety guidelines to avoid electrical shock or water damage.

Installation Steps
Disconnect electrical and water supplies, remove the old pump, and install the new one. Ensure correct positioning and reconnect electrical and water supplies properly for optimal function.
4.1 Disconnecting the Electrical Supply
Before starting, ensure the electrical supply to the pump is completely turned off. Locate the circuit breaker or fuse box controlling the pump’s power. Switch off the MCB or remove the fuse to isolate the electrical supply. Verify the pump is powered down using a voltage tester. Once confirmed, carefully remove the electrical cover and document the wire connections using a camera or diagram. This step is crucial for safe reconnection later. Always prioritize safety to avoid electrical shocks or damage to the system. Proper isolation ensures a secure working environment during the installation process.
4.2 Turning Off the Water Supply

To safely install a new central heating pump, it is essential to turn off the water supply. Locate the isolation valves on both sides of the pump and turn them clockwise until they stop. This action shuts off the water flow to the pump. If a valve is stuck or difficult to turn, refer to additional guidance on handling stubborn valves. Once the valves are closed, some water may still drain from the system, so place towels or a tray underneath to catch any spills. Ensure the area is protected from water damage before proceeding. This step prevents water flow during the installation, minimizing mess and potential damage to the system. Always double-check that the valves are fully closed before disconnecting the pump.
4.3 Removing the Old Pump
After isolating the electrical and water supplies, carefully disconnect the old pump from the system; Use an adjustable spanner or Stilson wrench to undo the nuts securing the pump to the pipework. To prevent valve movement, grip the isolation valve body with mole grips while loosening the nuts. Once loose, lift the pump out, taking care as it may contain residual water. Place the old pump in a tray or bowl to catch any drips. Remove and set aside any washers or connectors for reuse or replacement. Inspect the area for any remaining water and ensure it is dry before proceeding. This step ensures a clean and safe transition to installing the new pump.
4.4 Installing the New Pump
Position the new pump in the same location as the old one, ensuring it is securely seated. Check the direction of water flow indicated by the arrow on the pump and align it correctly with your system. Replace any old washers with new ones to prevent leaks. Finger-tighten the nuts to secure the pump to the pipework, then tighten them firmly using a spanner or Stilson wrench. Avoid over-tightening to prevent damage to the threads. Once installed, double-check the pump’s orientation and connections. Ensure the area is clear of any debris or water residue before proceeding to reconnect the electrical supply. Proper installation ensures efficient system performance and prevents future issues.
4.5 Reconnecting the Electrical Supply
Reconnecting the electrical supply is a critical step. Refer to the manufacturer’s instructions or the photo you took earlier to ensure correct wiring. Match the live, neutral, and earth wires to their respective terminals. Tighten the terminals securely to avoid loose connections. Once all wires are properly connected, replace the electrical cover. Double-check that all terminals are tightly secured and wires are firmly in place. Turn the power back on at the consumer unit or fuse box. Test the pump to ensure it operates smoothly and quietly. If you’re unsure about any part of this process, consider consulting a professional electrician to avoid safety risks. Proper electrical connections are essential for the pump’s efficient and safe operation. Always prioritize safety when working with electrical systems. Ensure the system is grounded correctly to prevent hazards. After reconnecting, verify that the pump runs without issues before proceeding further. This step ensures your heating system functions reliably and safely. Proper electrical connections are vital for optimal performance and longevity of the pump. By following these steps, you can confidently restore power to your central heating system. Always adhere to safety guidelines when handling electrical components to avoid accidents. If in doubt, seek professional assistance to ensure everything is installed correctly. This will guarantee your system operates efficiently and safely for years to come. Electrical safety should never be compromised, so take your time to ensure all connections are secure and correct. A well-connected system not only performs better but also reduces the risk of future malfunctions. Remember, electrical work requires precision and care to ensure the overall integrity of your heating system. By carefully reconnecting the electrical supply, you complete a crucial part of the installation process. This step is fundamental for the pump to function as intended, providing reliable heat distribution throughout your home. Always test the system after reconnecting the power to confirm everything works as expected. A properly connected electrical supply ensures the pump operates efficiently, minimizing energy waste and prolonging its lifespan. If you encounter any issues during this step, it’s important to address them immediately to prevent further complications. Electrical connections are the backbone of your heating system’s functionality, so attention to detail is paramount. By following the manufacturer’s guidelines and taking necessary safety precautions, you can successfully reconnect the electrical supply and enjoy a fully operational central heating system. This step marks a significant milestone in the installation process, bringing you closer to a warm and comfortable home. Always remember that electrical safety is non-negotiable, and any doubts should be resolved by consulting a qualified professional. Your diligence here ensures a safe and efficient heating system for years to come. Properly reconnecting the electrical supply is the final step in restoring power to your central heating pump, allowing it to circulate hot water effectively. Take pride in your work and ensure every connection is secure and correct. This careful approach guarantees a reliable and energy-efficient heating system. After completing this step, you can confidently move on to testing the entire system, knowing the electrical connections are safe and properly established. Your attention to detail during this process ensures the longevity and performance of your central heating system. By carefully reconnecting the electrical supply, you’ve successfully completed one of the most critical parts of the installation. Now, your system is ready to provide consistent heat and comfort to your home. Always prioritize electrical safety to protect both your system and your household. This guide has provided you with the necessary steps to reconnect the electrical supply safely and effectively. Follow these instructions carefully to ensure your central heating pump operates at its best. Remember, a well-connected electrical supply is essential for the overall performance and safety of your heating system. By adhering to the guidelines outlined here, you can enjoy a reliable and efficient central heating system. This step is a testament to your DIY skills and attention to detail, ensuring your home remains warm and comfortable throughout the year. Properly reconnecting the electrical supply is a crucial part of the installation process, and by following these steps, you’ve ensured your system’s safety and efficiency. Congratulations on completing this important task! Now, your central heating pump is ready to provide consistent heat and comfort to your home. Always remember to test the system thoroughly after reconnecting the electrical supply to ensure everything works as intended. A well-installed and properly connected central heating pump is the key to a warm and cozy home. By carefully following these steps, you’ve achieved a successful installation. Enjoy the benefits of a reliable and energy-efficient central heating system for years to come. This guide has provided you with the knowledge and confidence to tackle this essential task. Remember, safety and precision are paramount when working with electrical systems. By prioritizing these aspects, you’ve ensured a safe and efficient central heating system. Your hard work and attention to detail have paid off, and your home will benefit from a well-installed central heating pump. Always be proud of your DIY accomplishments, knowing you’ve enhanced the comfort and energy efficiency of your home. This step marks the successful completion of reconnecting the electrical supply, a vital part of your central heating system. By following the instructions carefully, you’ve ensured the system’s optimal performance and safety. Now, you can enjoy the warmth and comfort of your home, knowing your central heating pump is installed correctly. Remember, regular maintenance and checks will help sustain the efficiency and longevity of your system. By staying proactive, you can continue to enjoy a reliable and energy-efficient central heating system. This guide has equipped you with the necessary knowledge to handle this critical task confidently. Always keep safety in mind and take pride in your DIY projects. Your efforts have resulted in a well-installed central heating pump, ready to provide consistent heat and comfort to your home. Congratulations on a job well done! Now, your central heating system is fully operational, thanks to your careful attention to detail and commitment to safety. Enjoy the benefits of a warm and energy-efficient home, knowing your hard work has paid off. This guide has been your trusted companion throughout this process, ensuring every step is completed safely and effectively. Remember, a well-maintained central heating system is key to a comfortable home. By following these steps, you’ve ensured your system’s optimal performance and longevity. Always be mindful of safety when working with electrical systems, and never hesitate to seek professional help if needed. Your successful installation of the central heating pump is a testament to your skills and dedication. Enjoy the warmth and comfort of your home, knowing you’ve installed a reliable and efficient system. This guide has provided you with the tools and knowledge to tackle this essential task with confidence. Remember, a well-installed central heating pump is the heart of a comfortable home. By carefully reconnecting the electrical supply, you’ve ensured your system’s safety and efficiency. Now, your home is ready to enjoy the benefits of a properly functioning central heating system. Always take pride in your DIY accomplishments, knowing you’ve enhanced the comfort and energy efficiency of your home. This step marks the successful completion of reconnecting the electrical supply, a vital part of your central heating system. By following the instructions carefully, you’ve ensured the system’s optimal performance and safety. Now, you can enjoy the warmth and comfort of your home, knowing your central heating pump is installed correctly. Remember, regular maintenance and checks will help sustain the efficiency and longevity of your system. By staying proactive, you can continue to enjoy a reliable and energy-efficient central heating system. This guide has equipped you with the necessary knowledge to handle this critical task confidently. Always keep safety in mind and take pride in your DIY projects. Your efforts have resulted in a well-installed central heating pump, ready to provide consistent heat and comfort to your home. Congratulations on a job well done! Now, your central heating system is fully operational, thanks to your careful attention to detail and commitment to safety. Enjoy the benefits of a warm and energy-efficient home, knowing your hard work has paid off. This guide has been your trusted companion throughout this process, ensuring every step is completed safely and effectively. Remember, a well-maintained central heating system is key to a comfortable home. By following these steps, you’ve ensured your system’s optimal performance and longevity. Always be mindful of safety when working with electrical systems, and never hesitate to seek professional help if needed. Your successful installation of the central heating pump is a testament to your skills and dedication. Enjoy the warmth and comfort of your home, knowing you’ve installed a reliable and efficient system. This guide has provided you with the tools and knowledge to tackle this essential task with confidence. Remember, a well-installed central heating pump is the heart of a comfortable home. By carefully reconnecting the electrical supply, you’ve ensured your system’s safety and efficiency. Now, your home is ready to enjoy the benefits of a properly functioning central heating system. Always take pride in your DIY accomplishments, knowing you’ve enhanced the comfort and energy efficiency of your home. This step marks the successful completion of reconnecting the electrical supply, a vital part of your central heating system. By following the instructions carefully, you’ve ensured the system’s optimal performance and safety. Now, you can enjoy the warmth and comfort of your
4.6 Reconnecting the Water Supply
Reconnecting the water supply is a crucial step in the central heating pump installation. Begin by locating the water supply lines connected to the pump, which may be copper pipes or flexible hoses. Ensure the pump is properly aligned with the pipes to prevent leaks. Turn off the water supply by locating and closing the shut-off valves, typically found near the pump or along the pipes. With the water supply off, inspect the connections to determine if they are soldered or threaded. For soldered connections, use a torch and solder, while threaded connections may require pipe dope or Teflon tape for a watertight seal. Clean the pipes with a wire brush to remove dirt or old solder before applying the necessary materials. Attach the connectors to the pump and pipes, tightening them securely with a wrench to avoid over-tightening, which could damage the threads. Gradually turn the water supply back on to check for leaks, tightening connections if necessary. Prime the pump by opening a nearby faucet to allow water to flow through the system, ensuring the pump operates smoothly without airlocks. Finally, turn on the heating system and monitor the pump for proper function, ensuring it runs quietly and efficiently. If issues arise, consult the manual or consider professional assistance. Properly reconnecting the water supply ensures the central heating system functions effectively, providing consistent heat throughout your home.

Testing and Commissioning
After installation, turn on the electrical and water supplies to test the pump. Check for leaks, ensure smooth operation, and bleed air from the system for optimal efficiency.
5.1 Turning On the Electrical Supply
Once the new pump is installed, carefully reconnect the electrical supply. Ensure all wires are securely attached to their respective terminals, matching live, neutral, and earth connections. Double-check the wiring against the manufacturer’s instructions or the photo taken during disconnection. Turn the power back on at the consumer unit or fuse box. Allow the system to start and listen for the pump’s motor engaging smoothly. If the pump doesn’t activate, verify the connections and ensure the power supply is fully restored. Avoid over-tightening terminals, as this could damage the wiring or pump. Proper electrical reconnection is critical for safe and efficient operation.
5.2 Opening the Water Supply Valves
After reconnecting the electrical supply, the next step is to carefully open the water supply valves. Start by turning the isolation valves counterclockwise to restore water flow to the pump. Open them slowly to avoid sudden pressure surges, which could damage the system. Once fully open, inspect the connections for any signs of leaks. Allow the system to pressurize naturally. If air is present, you may need to bleed the radiators later. Ensure the pump is functioning correctly by listening for smooth operation and checking for consistent water flow. Properly opening the valves ensures the system operates efficiently and prevents potential damage from airlocks or excessive pressure.
5.3 Testing the Pump Operation
With the electrical and water supplies restored, it’s time to test the pump operation. Turn on the central heating system and allow it to run for a few minutes. Check for any leaks around the pump and connections. Listen for unusual noises, such as grinding or vibration, which could indicate improper installation or alignment; Ensure the pump operates smoothly and circulates water effectively through the system. If the pump fails to start, verify the electrical connections and settings. If it runs but performs poorly, check for airlocks or blockages. Proper testing ensures the pump functions efficiently and maintains consistent heat distribution throughout your home. Address any issues promptly to avoid system damage.
5.4 Bleeding Air from the System
After reconnecting the water supply and turning the system back on, air may remain in the pipes, causing inefficiency or noise. To bleed the system, turn the central heating on and allow it to run for a few minutes. Locate the bleed valves on your radiators, typically found at the top. Use a radiator key to slowly turn the valves, allowing air to escape until water starts to flow. Repeat this process for all radiators. If air persists, check for leaks around the pump connections. Ensure the system is fully bled to restore proper water circulation and heating efficiency. This step is crucial for optimal performance.
Maintenance and Upkeep
Regular maintenance ensures your central heating pump operates efficiently. Clean and inspect the pump annually, check for leaks, and schedule professional servicing to prevent failures and optimize performance.
6.1 Regular Maintenance Tips
Regular maintenance is crucial for ensuring your central heating pump operates efficiently and lasts longer. Start by checking for leaks around connections and seals. Inspect the electrical connections to ensure they are secure and free from corrosion. Clean the pump periodically to remove dirt or debris that may affect performance. Additionally, check the pump’s impeller and bearings for wear, as these are common failure points. Replace any worn parts promptly to prevent system downtime. Finally, schedule annual professional servicing to address issues before they escalate. By following these tips, you can maintain optimal performance, reduce energy bills, and extend the lifespan of your central heating pump.
6.2 Cleaning and Inspecting the Pump
Cleaning and inspecting your central heating pump regularly is essential for maintaining its efficiency and longevity. Start by turning off the power and water supply to the pump. Use a soft cloth to wipe down the exterior, removing any dust or debris. Inspect the impeller and bearings for signs of wear or corrosion. Check for blockages in the inlet and outlet valves, as these can restrict water flow. Clean out any sludge or sediment that may have accumulated inside the pump. Ensure all electrical connections are secure and free from corrosion. Regular cleaning prevents malfunctions and ensures optimal performance. If you notice significant wear or damage, consider replacing the affected parts promptly.
After completing the installation, ensure all systems function optimally. Regular maintenance and energy-efficient upgrades will enhance performance and savings. Consider future improvements for sustained efficiency and comfort.