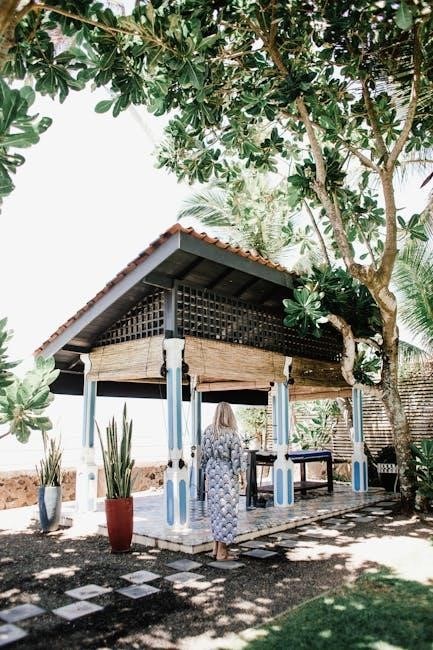
Transform your backyard with the Cordova Gazebo 10×14, a durable and stylish structure designed for year-round enjoyment. Crafted from high-quality cedar wood, it offers natural beauty and resistance to rot. With pre-cut, pre-stained, and pre-drilled components, this gazebo ensures a hassle-free assembly process. The BILT app provides 3D interactive guidance, making setup straightforward and efficient. Engineered to withstand harsh weather, it features a heavy-duty steel roof and robust frame, perfect for creating a serene outdoor oasis. Follow the step-by-step instructions to bring your backyard vision to life effortlessly.
Key Features and Benefits of the Cordova Gazebo
The Cordova Gazebo 10×14 stands out for its durability and elegant design, offering a perfect blend of functionality and style. Built with 100% cedar wood, it ensures natural beauty and rot resistance, while the heavy-duty 29-gauge steel roof provides exceptional strength against harsh weather. It can withstand snow loads up to 8,218 lbs. and winds of up to 100 mph, making it a reliable choice for year-round use. The pre-cut, pre-stained, and pre-drilled components simplify assembly, saving time and effort. The gazebo’s spacious 10×14 ft. design offers ample room for outdoor entertaining, while its classic aesthetics enhance any backyard. The BILT app’s 3D interactive guide further enhances the assembly experience, ensuring a seamless setup. Engineered for resilience and designed for comfort, the Cordova Gazebo is an excellent investment for creating a lasting outdoor oasis.

Unpacking and Inventory
Begin by carefully unpacking all components and verifying each part against the owner’s manual. Organize hardware, frames, and panels to ensure nothing is missing or damaged.
How to Organize Parts and Tools Before Starting
Organize parts by labeling and grouping them according to the assembly manual. Lay out all components in a clear workspace, matching each piece to its corresponding number. Gather essential tools like a wrench, screwdriver, and drill. Use the BILT app for 3D guidance to ensure every part is accounted for. Separate hardware into categories, such as bolts, screws, and brackets, and store them in labeled containers. This systematic approach prevents delays and ensures a smooth assembly process. Double-check the inventory list to confirm all items are present before beginning.
Site Preparation
Select a flat, dry spot, ensuring the area is clear of debris and vegetation. Check for underground utilities and ensure the ground is level and square. Compact the soil to create a stable base for assembly.
Choosing the Right Location and Leveling the Ground
Start by selecting a flat, dry spot in your yard, ensuring it’s clear of debris and vegetation. Mark the center of your desired gazebo location with a stake and string to outline the 10×14 footprint. Measure and verify the space is square by ensuring the diagonal measurements are equal. Clear the area of any obstructions and check for underground utilities. Use a shovel to remove grass and level the ground using a spirit level. Fill low spots with compacted gravel or soil, ensuring the surface is even. This preparation ensures a stable base for your gazebo, preventing structural issues during assembly.
Assembly Process
Begin by constructing the frame, ensuring all pieces align securely. Follow the BILT app or manual for precise instructions. Start with the base, then gradually add roof and side panels, verifying stability at each step. Use provided hardware and tools for a seamless setup. Check each section for proper alignment and tighten all bolts firmly. Complete the process by securing the roof and ensuring the structure is level and sturdy. This methodical approach guarantees a successful and stress-free assembly experience.

Step-by-Step Instructions for Frame, Roof, and Sides
Begin by assembling the frame using pre-drilled holes and bolts. Attach side panels securely, ensuring alignment. Next, place the roof structure atop the frame, fastening with provided hardware. Tighten all connections firmly. Use a level to verify stability. For sides, attach pre-stained panels to the frame, ensuring snug fit. Double-check all alignments and tighten bolts. Refer to the BILT app or manual for visual guidance. Organize parts by number to streamline assembly. Use a wrench and screwdriver for hardware. Ensure all sections are level and secure before moving to the next step. Follow instructions carefully to avoid mistakes and ensure a sturdy structure.

Maintenance and Upkeep
Regularly clean the gazebo using mild detergent and water to maintain its appearance. Inspect for damage and tighten loose bolts. Protect the roof from heavy snow and ensure the structure remains dry to prevent corrosion and extend lifespan.
Cleaning, Seasonal Care, and Protecting the Gazebo
Regular cleaning is essential to maintain the Cordova Gazebo’s appearance and longevity. Use mild detergent and water to wipe down surfaces, avoiding harsh chemicals that might damage the finish. For seasonal care, remove snow promptly to prevent roof strain and inspect for any damage. Apply a waterproof sealant annually to protect the wood. In windy areas, secure the structure with anchors. Store cushions and fabrics indoors during harsh weather to preserve their quality. By following these steps, you ensure your gazebo remains a beautiful and durable outdoor retreat for years to come.

Troubleshooting Common Issues
Address alignment issues by rechecking hardware and tightening bolts. Use the BILT app for guidance. Ensure the structure is securely anchored to withstand weather conditions.

Addressing Challenges During and After Assembly
During assembly, ensure all parts are correctly aligned and securely fastened. If bolts seem loose, tighten them firmly. For misaligned panels, recheck the frame and adjust accordingly. Post-assembly, inspect for any gaps or instability. Use anchor kits to enhance stability and prevent shifting due to wind. If roof leaks occur, apply a waterproof sealant. Regularly check for corrosion on metal components and treat promptly. For persistent issues, consult the BILT app or contact customer support for assistance. Maintaining your gazebo regularly will prevent major problems and extend its lifespan.
Safety Considerations
Always assemble on a firm, level surface. Ensure all parts are securely fastened. Avoid overloading the roof. Wear proper footwear and gloves. Follow manual instructions carefully.
Precautions and Best Practices for a Safe Setup
Ensure the site is level and firm to prevent structural instability. Wear protective gear like gloves and sturdy footwear. Verify all parts and tools are accounted for before starting. Follow the manual or BILT app instructions closely. Avoid assembling in extreme weather conditions. Double-check all bolts and connections for tightness. Use proper lifting techniques to prevent injury. Anchoring the gazebo securely is crucial to withstand wind. Keep children and pets away during assembly. Regularly inspect the structure for wear and tear. For complex steps, consider enlisting a second person or professional help. Ensure electrical components are safely installed and grounded. Always adhere to local building codes and safety standards.


Additional Features and Customization
Elevate your Cordova Gazebo with accessories like solar lights, ceiling hooks, and decorative trim. Add cushions, curtains, or a ceiling fan for comfort and style. Use stain or paint to match your home’s aesthetic. Incorporate plant hangers or shelves for greenery. Install electrical outlets for lighting or entertainment; Customize the roof with shingles or decorative tiles. Enhance durability with a waterproof sealant. Personalize the space with themed decor for events. These touches create a unique, functional outdoor retreat tailored to your preferences.
Enhancing Your Gazebo with Accessories and Personal Touches

Enhance your Cordova Gazebo with accessories to create a personalized outdoor space. Add solar lights or string lights for ambient evening illumination. Incorporate cushions, pillows, and curtains for comfort and style. Install a ceiling fan or hanging plants to elevate the ambiance. Use decorative accents like trim, moldings, or carved details for a unique look. Consider adding a gazebo heater or fire pit for year-round use. Personalize the space with themed decor, such as nautical or rustic elements. For functionality, add electrical outlets or USB ports. Apply a fresh coat of stain or paint to match your home’s aesthetic. These touches transform your gazebo into a cozy, functional retreat tailored to your lifestyle.

Assembling the Cordova Gazebo 10×14 is a rewarding project that enhances your outdoor space with style and functionality. With its durable materials and weather-resistant design, this gazebo provides a serene retreat for years to come. The pre-cut and pre-drilled components, along with the BILT app’s guidance, make the assembly process manageable for DIY enthusiasts. Once completed, it becomes a perfect spot for relaxation, entertaining, or enjoying nature. Regular maintenance and personal touches will ensure it remains a beautiful focal point in your yard. Congratulations on completing your Cordova Gazebo assembly—your new outdoor oasis awaits!


